
Configure notifications
Webhooks, also known as web callbacks, are HTTP messages that Mercado Pago sends to your server when a specific event occurs in your integration. Instead of your system constantly querying for updates, Webhooks transmit data automatically through an HTTPS POST request.
Configure Webhooks
Below, we present a step-by-step guide to receiving notifications in integrations with Checkout Pro. Once configured, Webhook notifications will be sent whenever any update occurs on the reported topic, including the creation and update of orders and transaction processing.
- Go to Your integrations and select the application integrated with Checkout Pro for which you want to activate notifications.
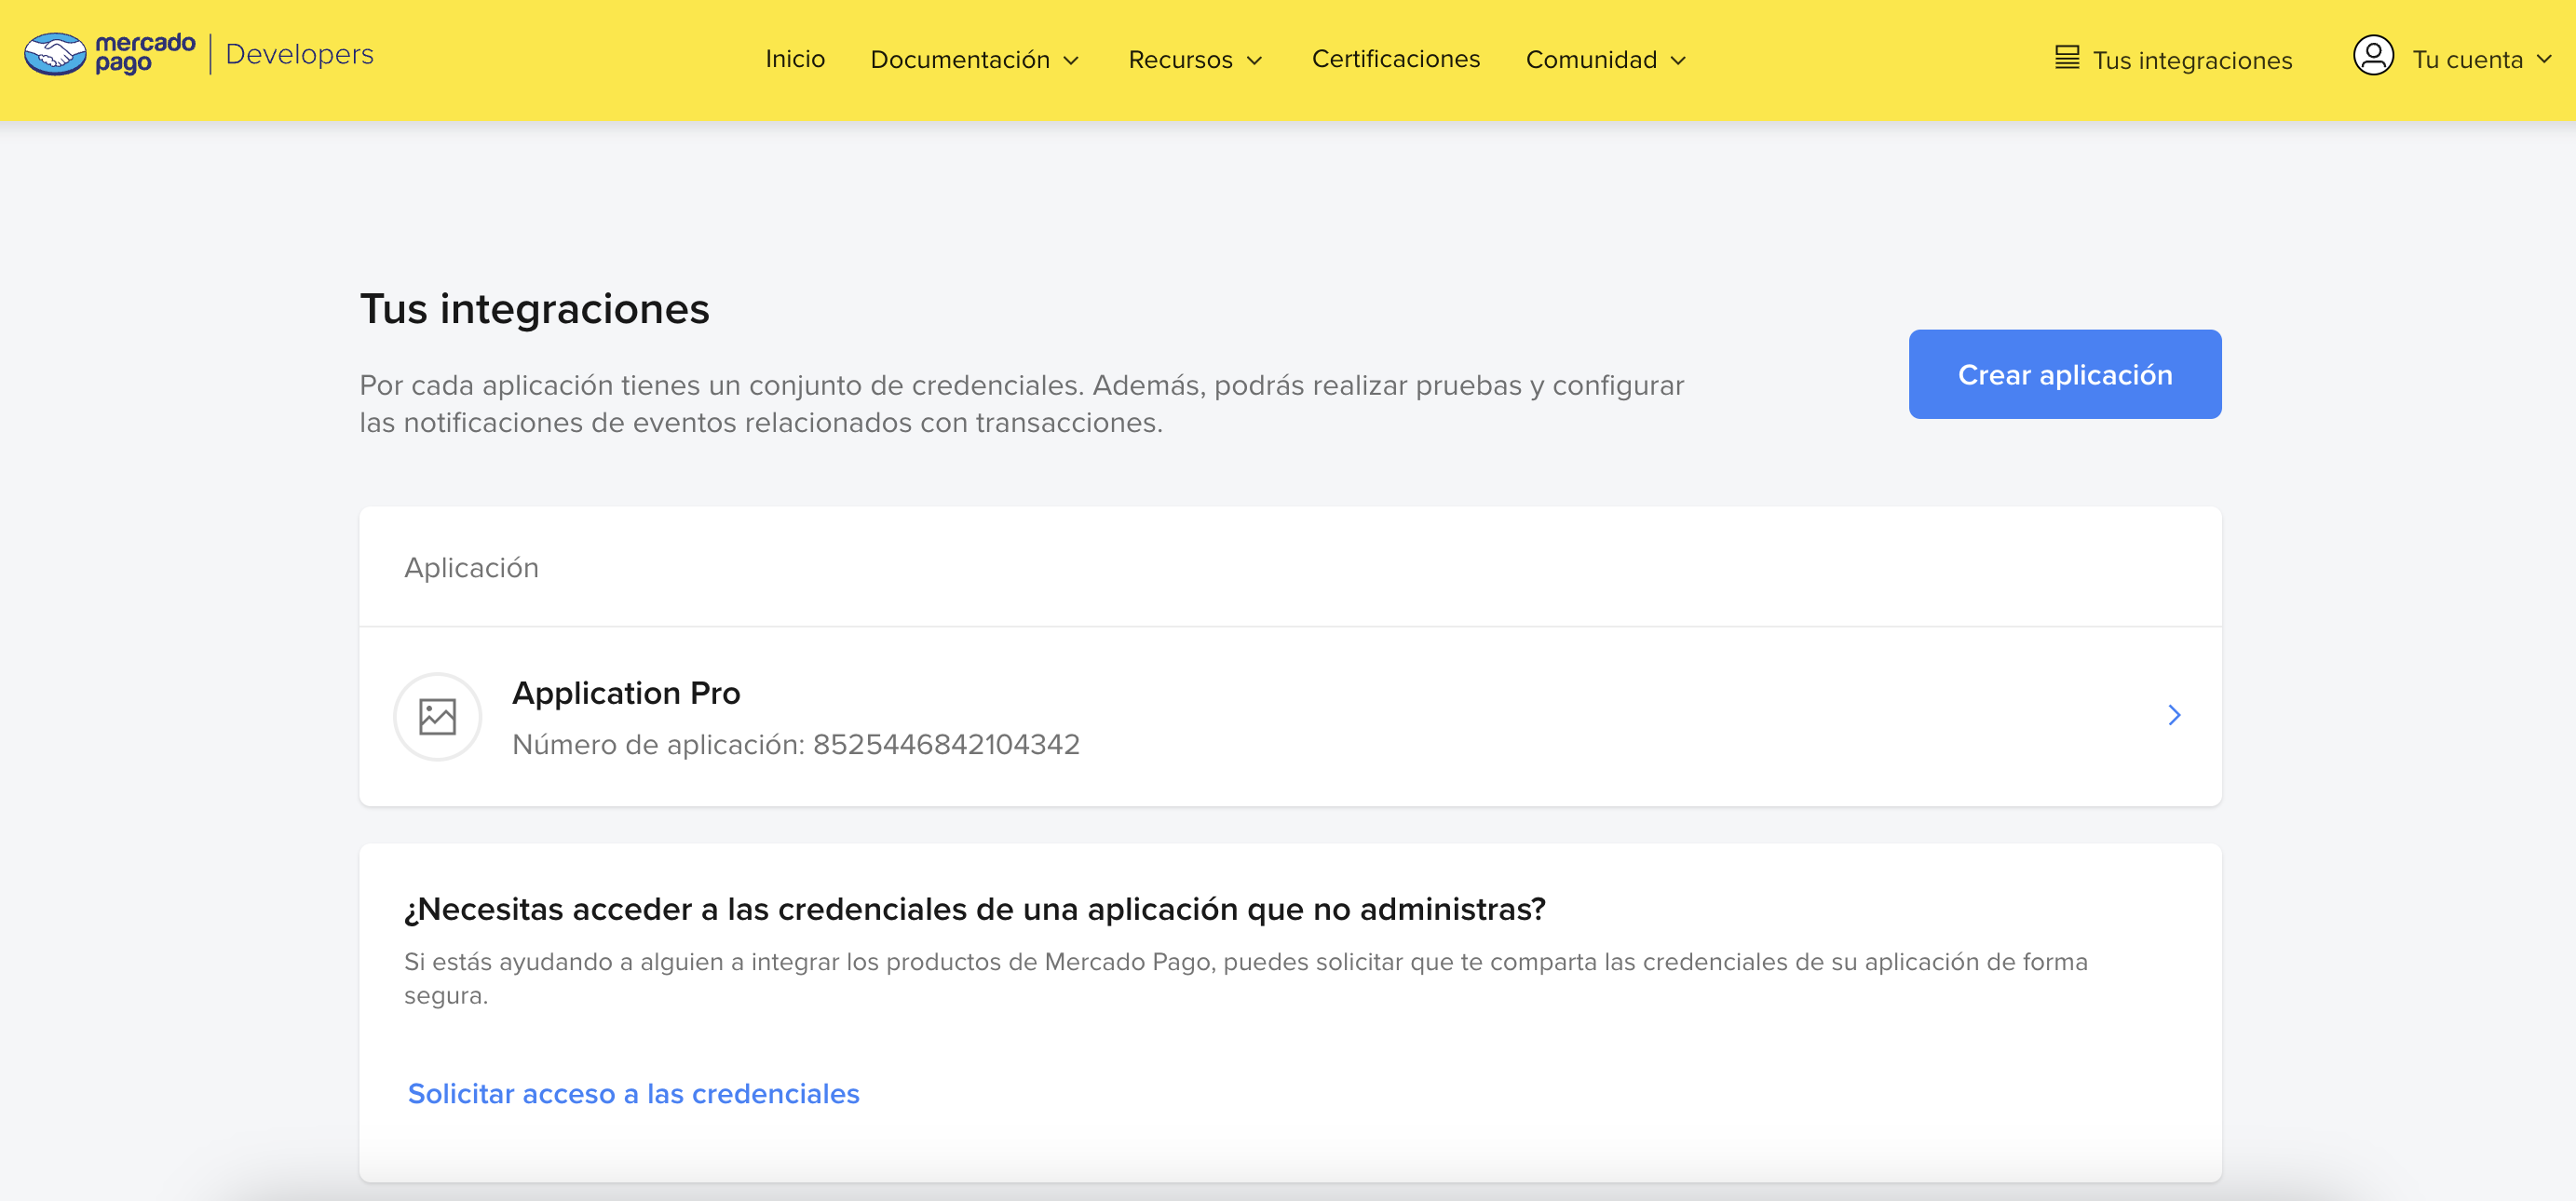
- In the left menu, select Webhooks > Configure notifications.

- Select the Production mode tab and provide an
HTTPS URLto receive notifications with your productive integration.
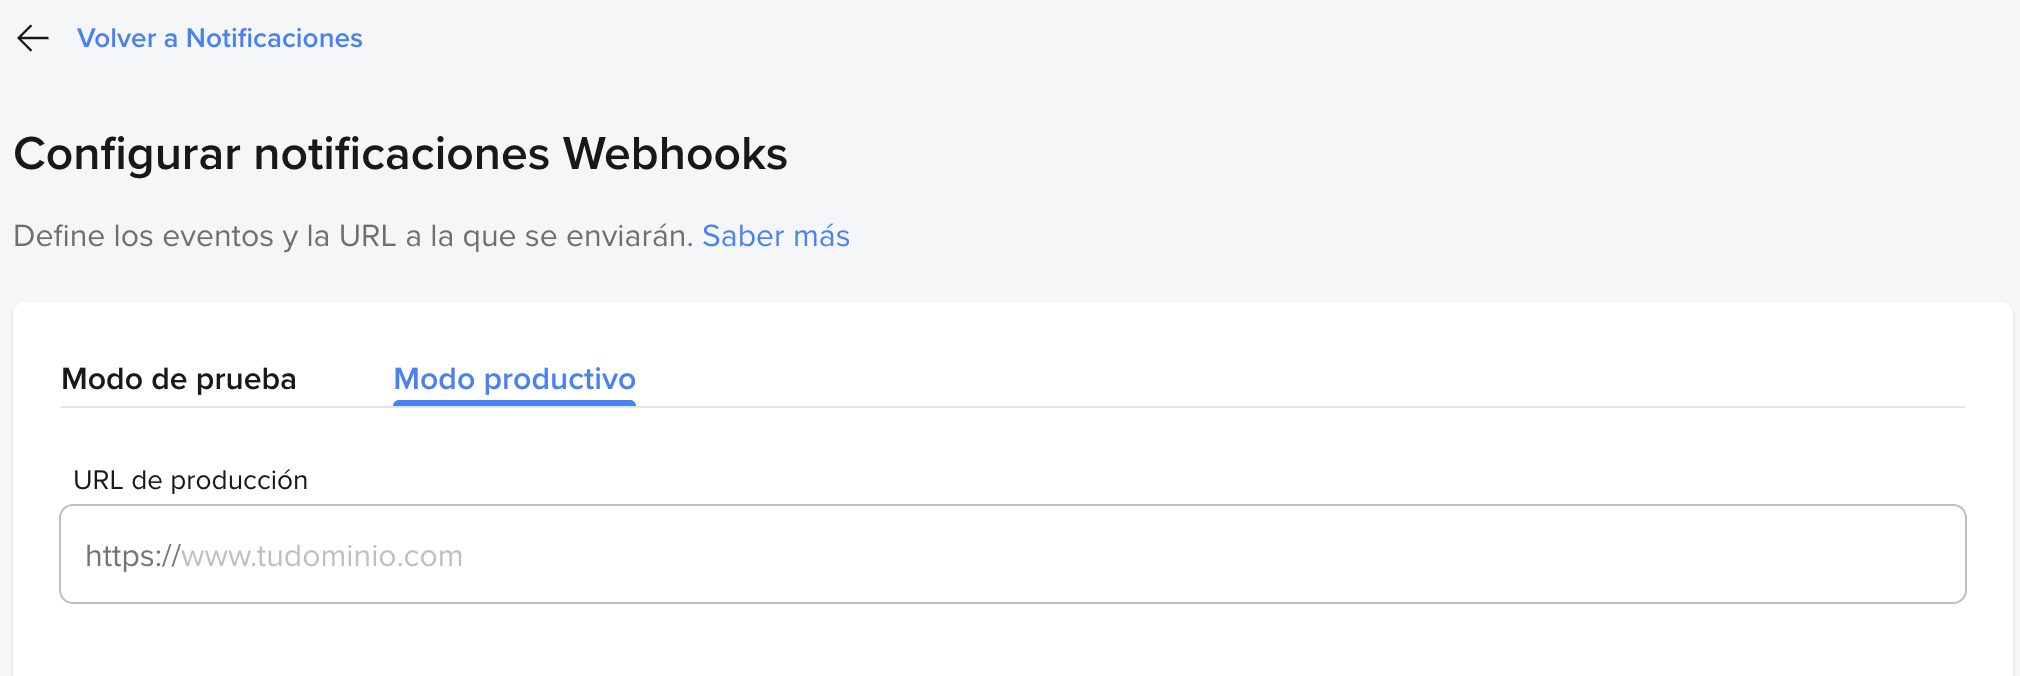
- Select the Order (Mercado Pago) event to receive notifications, which will be sent in
JSONformat via anHTTPS POSTto the URL specified above.

- Finally, click on Save configuration. This will generate an exclusive secret key for the application, which will allow you to validate the authenticity of the received notifications, ensuring that they were sent by Mercado Pago. Keep in mind that this generated key does not have an expiration date and its periodic renewal is not mandatory, although it is recommended. To do this, simply click the Reset button.
Simulate receiving the notification
To ensure that notifications are configured correctly, it is necessary to simulate their reception. To do this, follow the steps below.
- After configuring the URL and the event, click on Save configuration.
- Then, click on Simulate to test if the indicated URL is correctly receiving notifications.
- On the simulation screen, select the URL to be tested.
- Next, choose the event type and enter the ID that will be sent in the notification body (
Data ID).

- Finally, click on Send test to verify the request, the response provided by the server, and the event description. You will receive a response as shown in the example below, representing the body of the notification received on your server.
json
{ "action": "order.processed", "api_version": "v1", "application_id": "123456", "date_created": "2025-08-07T18:54:40.851374414Z", "id": "123456", "live_mode": true, "type": "order", "user_id": 123456, "data": { "id": "ORD01JYH1Z1YJN4HZ8J3Q0RB3YP6D" } }
Validate the origin of the notification
Validating the origin of a notification is essential to ensure the security and authenticity of the received information. This process helps prevent fraud and ensures that only legitimate notifications are processed.
Mercado Pago will send your server a notification similar to the example below for an order topic alert. This example includes the complete notification, which contains the query params, the body, and the header of the notification.
- Query params: These are query parameters that accompany the URL. In the example, we have
data.id=ORD01JQ4S4KY8HWQ6NA5PXB65B3D3andtype=order. - Body: The body of the notification contains detailed information about the event, such as
action,api_version,application_id,date_created,id,live_mode,type,user_id, anddata. - Header: The header contains important metadata, including the secret signature of the notification
x-signature.
http
POST /test?data.id=ORD01JQ4S4KY8HWQ6NA5PXB65B3D3&type=order HTTP/1.1 Host: test.requestcatcher.com Accept: */* Accept-Encoding: * Connection: keep-alive Content-Length: 177 Content-Type: application/json Newrelic: eyJ2IjpbMCwxXSwiZCI6eyJ0eSI6IkFwcCIsImFjIjoiOTg5NTg2IiwiYXAiOiI5NjA2MzYwOTQiLCJ0eCI6ImY4MzljZjg4ODg2MGRmZTIiLCJ0ciI6ImMwOGMwZGMyMjNjZDY2YjJkZWQwMjUxZmYxNWNiNGQ1IiwicHIiOjEuMjUwMzIsInNhIjp0cnVlLCJ0aSI6MTc0Mjg0MjU4MDE2NCwiaWQiOiIxOGI2NDcxNjNkNzI3NjU4IiwidGsiOiIxNzA5NzA3In19= Traceparent: 00-c08c0dc223cd66b2ded0251ff15cb4d5-18b647163d727658-01 Tracestate: 1709707@nr=0-0-989586-960636094-18b647163d727658-f839cf888860dfe2-1-1.250320-1742842580164 User-Agent: restclient-node/4.15.3 X-Request-Id: 2066ca19-c6f1-498a-be75-1923005edd06 X-Rest-Pool-Name: /services/webhooks.js X-Retry: 0 X-Signature: ts=1742505638683,v1=ced36ab6d33566bb1e16c125819b8d840d6b8ef136b0b9127c76064466f5229b X-Socket-Timeout: 22000 {"action":"order.processed","api_version":"v1","application_id":"123456","date_created":"2025-08-07T18:54:40.851374414Z","id":"123456","live_mode":true,"type":"order","user_id":123456,"data":{"id":"ORD01JYH1Z1YJN4HZ8J3Q0RB3YP6D"}}
From the received Webhook notification, you can validate the authenticity of its origin. Mercado Pago will always include the secret key in Webhook notifications, which will allow you to validate their authenticity. This key will be sent in the x-signature header, which will look similar to the example below.
plain
ts=1742505638683,v1=ced36ab6d33566bb1e16c125819b8d840d6b8ef136b0b9127c76064466f5229b
To confirm the validation, you need to extract the key contained in the header and compare it with the key provided for your application in Your integrations.
Follow one of the approaches below to validate the authenticity of the notification.
The official SDK implements HMAC-based Webhook Signature Verification to authenticate the origin of each notification received.
To obtain your secret key (secret), select the application in Your integrations, click on Webhooks > Configure notification and reveal the generated key.
<?php
use MercadoPago\Webhook\WebhookSignatureValidator;
use MercadoPago\Exceptions\InvalidWebhookSignatureException;

try {
    WebhookSignatureValidator::validate(
        $_SERVER['HTTP_X_SIGNATURE'],
        $_SERVER['HTTP_X_REQUEST_ID'],
        $_GET['data_id'],
        $secret
    );
    http_response_code(200);
} catch (InvalidWebhookSignatureException $e) {
    http_response_code(401);
}import { WebhookSignatureValidator, InvalidWebhookSignatureError } from 'mercadopago';
try {
WebhookSignatureValidator.validate({
xSignature: req.headers['x-signature'],
xRequestId: req.headers['x-request-id'],
dataId: req.query['data.id'],
secret,
});
res.sendStatus(200);
} catch (err) {
if (err instanceof InvalidWebhookSignatureError) res.status(401).end();
else throw err;
}from mercadopago.webhook import WebhookSignatureValidator, InvalidWebhookSignatureError
try:
WebhookSignatureValidator.validate(
request.headers.get("x-signature"),
request.headers.get("x-request-id"),
request.args.get("data.id"),
secret,
)
return "", 200
except InvalidWebhookSignatureError:
return "", 401import "github.com/mercadopago/sdk-go/pkg/webhook"
err := webhook.ValidateSignature(
r.Header.Get("x-signature"),
r.Header.Get("x-request-id"),
r.URL.Query().Get("data.id"),
secret,
)
if err != nil {
w.WriteHeader(http.StatusUnauthorized)
return
}
w.WriteHeader(http.StatusOK)using MercadoPago.Error;
using MercadoPago.Webhook;
try {
WebhookSignatureValidator.Validate(
xSignature: Request.Headers["x-signature"],
xRequestId: Request.Headers["x-request-id"],
dataId: Request.Query["data.id"],
secret: secret);
return Ok();
} catch (InvalidWebhookSignatureException) {
return Unauthorized();
}import com.mercadopago.webhook.WebhookSignatureValidator;
import com.mercadopago.exceptions.MPInvalidWebhookSignatureException;
try {
WebhookSignatureValidator.validate(
request.getHeader("x-signature"),
request.getHeader("x-request-id"),
request.getParameter("data.id"),
secret);
response.setStatus(200);
} catch (MPInvalidWebhookSignatureException e) {
response.setStatus(401);
}require 'mercadopago/webhook/validator'
begin
Mercadopago::Webhook::Validator.validate(
request.headers['x-signature'],
request.headers['x-request-id'],
request.params['data.id'],
secret
)
head :ok
rescue Mercadopago::Webhook::InvalidWebhookSignatureError
head :unauthorized
endRequired actions after receiving the notification
When you receive a notification on your platform, Mercado Pago expects a response to validate that the reception was correct. To do this, you must return an HTTP STATUS 200 (OK) or 201 (CREATED).
The waiting time for this confirmation will be 22 seconds. If this confirmation is not sent, the system will understand that the notification was not received and will make a new sending attempt every 15 minutes, until it receives the response. After the third attempt, the deadline will be extended, but the submissions will continue.
sequenceDiagram
    participant MercadoPago as Mercado Pago
    participant Integrador as Integrator

    MercadoPago->>Integrador: attempt: 1. Delay: 0 minutes
    MercadoPago->>Integrador: attempt: 2. Delay: 15 minutes
    MercadoPago->>Integrador: attempt: 3. Delay: 30 minutes
    MercadoPago->>Integrador: attempt: 4. Delay: 6 hours
    MercadoPago->>Integrador: attempt: 5. Delay: 48 hours
    MercadoPago->>Integrador: attempt: 6. Delay: 96 hours
    MercadoPago->>Integrador: attempt: 7. Delay: 96 hours
    MercadoPago->>Integrador: attempt: 8. Delay: 96 hours
After responding to the notification and confirming its receipt, you can get all the information about the notified order by sending a GET to the endpoint /v1/orders/{id}API.
With that information, you can make the necessary updates to your platform, such as updating an approved payment.